Welcome to my little corner of "The Cloud"
LIST OF FREE PATTERNS
BOTTOM LEFT SIDE OF PAGE

FAVORITE PAGES INDEX TOP RIGHT
DOUBLE CLICK ANY PHOTO TO ENLARGE FOR VIEWING
All patterns written in US crochet terms

Top 10 Most Popular Patterns This Week

Saturday, December 14, 2013

Basic Earflap Hat Pattern

hat (3)
BASIC HAT PATTERN

Size US I – 9 Susan Bates hook
Worsted weight yarn
Yarn needle
approximate size 21/22 inches
use larger or smaller hook and yarn weights to change size

Special instructions: 
If making a solid color hat follow the pattern as written. If making a
striped hat, join each round to avoid a color step.  Work in rounds, do not turn unless directed.

Start with magic circle OR chain 4, join.
Round 1: make 1 slip st, 1 hdc, 10 dc in ring, (12 sts) do not join rounds. Insert yarn marker, moving it up with each new row
Round 2: 2 dc in each st, (24 sts)
Round 3: 2 dc in next st, (1 dc in next st, 2 dc in next st), around (36 sts)
Round 4: 2 dc in next same st, (1 dc in next 2 sts, 2 dc in next st) around. (48 sts)
Round 5: 2 dc in same st, (1 dc in next 3 sts, 2 dc in next st) around. (60 sts)
Rnds 6-10 1 in each dc around, to last 2 sts, 1 half double crochet in next st, slip st in last stitch, turn.

NOTE:
If you are making a Character or Animal type hat, skip the rounds for the
Fold up cuff and go directly to the neckband.

FOLD UP Cuff

Round 1. At the end of the 10th round of hat, Chain 3, Working in the back loops only, DC around the helmet, Join
Round 2.  Ch 3, working through both loops, sc around, join.

Round 3 Ch 3 dc in each st, join, end off. Fold up flap.


There is currently no pattern for the Bunny hat


NECKBAND
Now working on hat in free stitches (front loops)
Place markers 18 stitches either side of center back.
Join yarn on "wrong side" of hat at first marker
Row 1 sc in each st to second marker. ch 1, Turn. (36 sc).
Row 2 & 3 repeat row 1, turn ch 1, turn.
Earflaps
Row 1 Sc2Tog, sc in next 10 sc, Sc2Tog, Chain 1, Turn.
Repeat row 1 working first and last 2 sc together until only 2 st remain, end off.

Second Earflap
On opposite side of hat, starting on the wrong side (inside of hat) count back 14 stitches from the end, join yarn, ch 1, sc first 2 st tog, sc in next 10 sts, sc last 2 st tog, ch 1 turn,    Repeat row working first and last 2 sc together until only 2 st remain end off.
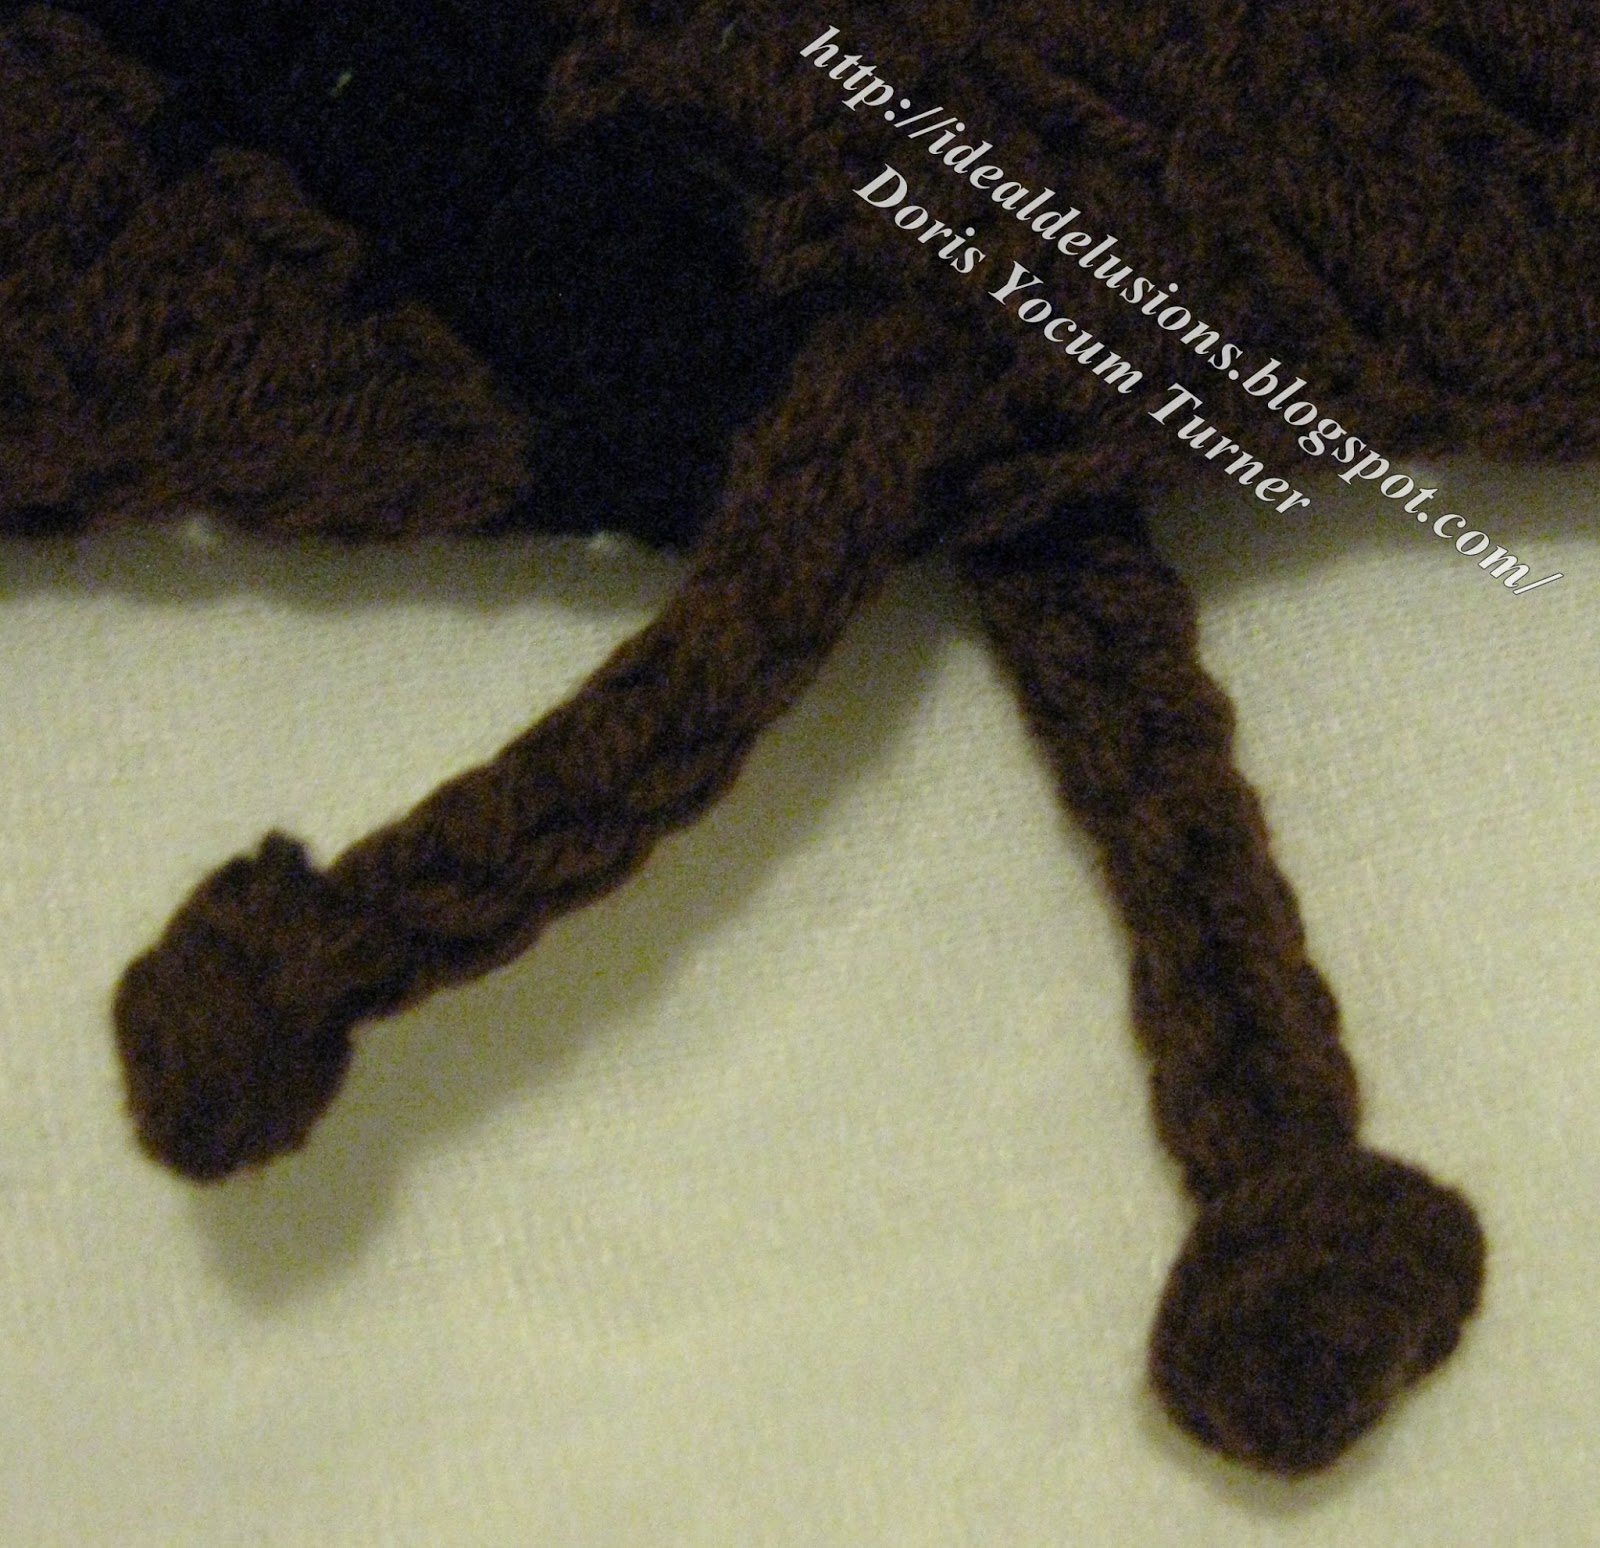
Edge and Ties
Using color of choice join yarn at back seam, chain 1, sc to flap, sc up side of flapthe top 2 stitches of flap. Sc in first st, Chain 40 and slip stitch back 39 chains, Sc in second top st continue down other side of flap, sc in each stitch between flaps. Sc up side of second flap to the top stitches, Sc in first st, Chain 40 and slip stitch back 39 chains, Sc in second top st continue down other side of flap, sc in each stitch to back seam. Join end off. Work in ends.

Cuff Pattern: White Hat
Round 1 At the end of the 10th round of hat, Attach new color (Green) Ch 3, turn. Working in the back loops only, dc in each stitch around the helmet, Join, end off.
Round 2 Working through both loops, attach new color (Pink) ch 4, 2 dc in same stitch, *(skip 2 stitches, sc, chain 3, 2 dc in same stitch) around. Join, end off. Turn
Round 3 Attach new color (Lavender) in first chain 3 loop of previous row, *(work sc, ch 3, 2 dc,) in each ch 3 loop around. Join, end off, Turn.
Round 4 Attach, new color (Green) work 3 sc in each chain 3 loop around. Join, end off.
Work in all ends

Cuff Pattern for Light PINK hat:
Round 1 Attach Color A, Chain 3 Double Crochet in each stitch around. End off 
Round 2 Attach Color B, chain 1, Single Crochet in each stitch around. End off
Round 3 Attach Color A, chain 3, Double Crochet in each stitch around. End off
Round 4 Attach Color B, *(sc, in first st, sc with picot in next st, sc in next st) around.  
End off work in all ends.

Cuff Pattern for Hot Pink hat:
Round 1 Attach Color A, Chain 3 Double Crochet in each stitch around. End off 
Round 2 Change to Color B, chain 1, Single Crochet in each stitch around. End off
Round 3 Attach Color A, chain 3, Double Crochet in each stitch around. End off
Round 4 Attach Color B, *(chain 3, dc in same stitch, skip 2 stitches, slip stitch in next stitch, ch 3, dc in same stitch) around. 
End off work in all ends.
Pom-Pom
Using color of choice, make 1 ½ inch Pom-Pom. Leave long yarn tails. 
To secure Pom-pom to hat:

At top of hat, working on outside of hat, thread the yarn tails, of the completed Pom-Pom in opposite directions, under stitches at center top round of hat and pull each back to right side. Pull ends tightly under the Pom-Pom at the back of the hat, and tie knot as close to the hat as possible,  ''knot several times.

Trim ends the same length as the width of the Pom-Pom

Eye(s)
 
Small amounts of worsted weight yarn, Black, White, Gray
Size I – 9 US hook
Yarn Needle

Special Stitches *How to Tambour Crochet
http://www.youtube.com/watch?v=WU2arovVYJY

Note:
Before selecting/adding the number and size of the eye(s) consider the added weight to the front of the hat, in relation of the size of the designate hat and the sweet little head that will be wearing it. 

LARGE EYE - Hat with 1 eye:
Start with magic loop
Rnd 1. With black, 11 hd in ring, join. End off.
Rnd 2. Change to white, 2 dc in each stitch around, Join. (22 dc)

Use 2 strands of yarn:
Rnd 3. Change to gray, working as overlay *(Tambour Crochet), through both loop of double crochet, slip stitch in each stitch around two times, the second round on top of the first, to give the needed height to represent the depth of the Goggles.

Go to Rnd *4


SMALLER EYE - Hat with 2 eyes,
Start with magic loop
Rnd 1. With black, 11 single crochet in ring, join, end off.
Rnd 2. Change to white, 2 hd in each stitch around (22 dc) join, End off

Use 2 strands of yarn
Rnd 3. Change to gray, working as overlay *(Tambour Crochet), through both loop of double crochet, slip stitch in each stitch around two times, the second round on top of the first, to give the needed height to represent the depth of the Goggles.
 
Rnd *4. To end gray, cut one strand of gray yarn at 2 inches. Leave the second strand of gray yarn long enough to sew eye in place on hat.

To Create/Assemble hat:
Use any hat pattern you like, with or without earflaps. Use Yellow for the beginning rounds, work up until the last 6 rounds. Change to Black, work the next 2 rounds in half double crochet. Change back to yellow and complete hat pattern.  
Sew eye(s) in place, 
Use *(Tamboru Crochet) to add mouth.
Add wisps of black yarn for hair if desired.

Pair with Yellow Scarf and Yellow Mittens on which you have sewn "eye(s)" or not. 
 

Monday, November 11, 2013

Retro Poodle Tissue Topper


I saw one of these in the 1960's, thought it was cute, went home  and made a bunch of them from memory.  I have often been asked for this pattern and since I never had a pattern I have decided to share the way I always make mine.  They are now considered Retro or perhaps tacky but, cute in any color, I still love mine. 

Materials Roll of Toilet Tissue
Worsted weight yarn and Yarn Needle
Size I (9) crochet hook
Small amount fiber fill for head
20 MM Oval Wiggle eyes or Buttons or Felt
Small piece of Colored felt for nose
Glue for nose and eyes
Pom Pom makers sizes "1-3/8", and "2 1/2"
(I used Clover Pom Pom Makers)

* Magic circle or ring or loop all the same thing.  Video and Photo links


Body
Start with magic circle.
Rnd 1 ch 3, (always counts as first dc) 11 dc in ring, join with Slipstitch.
Rnd 2 ch 3, dc in same st, 2 dc in each st around, join (24 stitches)
Rnd 3 ch 3, dc in same st, *(dc in next st, 2 dc in next st ) around, join (36 stitches)
Rnd 4 ch 3, dc in same st, *(dc in next 2 stitches, 2 dc in next st) around (48 stitches)
Rnd 5 Begin side, ch 3, working in back loop only, dc in each dc around, join.
Rnd 6 (thru 12) ch 3, working in both loops double crochet in each stitch around, join, ch 3.
Rnd 13 sc in each stitch around, join, fasten off, work in yarn end.

Head (part one)
Start with Magic Circle, work 12 sc in circle, do not join. Continue working a single crochet in each stitch around, until tube measures 2 1/2 inches in height. End and leave a long tail for sewing. Draw the beginning magic circle tightly closed, secure and draw end to inside of tube. Stuff tube as full as you can to ensure head will be very firm and stand upright. Leave 16 inch tail for sewing

(part two)Start with Magic Circle, work 12 sc in circle. End off. Matching sitch to stitch sew disk to bottom of head piece to secure stuffing in place. Next, matching 12 stitches of starting ring on body with the 12 stitches of the end of tube, sew head tube to center of body so it stands upright like a post.

Pom-Poms Leaving 6 inch long tails on all Pom-poms
size "2 1/2" make 3 for head, 4 for legs and 1 for the tail (total 8)
size "1-3/8" make 1 for nose

Place cover on roll and using photo for a guide tie pom-poms onto cover to create appearance and shape of poodle.

Add tail first at the exact back of poodle body on the joining line, high enough so it is not touching the table beneath. Working on right side of cover use yarn needle to draw yarn end under several stitches to hold pom-pom in place and keep it from flopping. Knot several times and trim ends the length of the pom-pom yarn.

Turn poodle to front and to maintain head balance use the same method to add top pom-pom to exact center top of head.

The side pom-poms should be on the exact opposite side of the head, both on the exact same level, high enough to touch the top pom-pom but not so high as to merge with it.

Add nose before gluing the eyes in place. Place the nose just low enough to leave room for the eyes. Here may I add, contrary to popular belief, the eyes are located in the center of the head, not the nose. The nose is located in the center of the face. Trust me on this one.
Glue eyes in place and glue small felt heart or oval in place for nose.

If desired you can make one more pom-pom and tie to back of head level with the side pom-poms to make head appear more round.  You may ask why do this as this poodle is designed to be viewed from the front but it will offset the weight of the nose pom-pom so your head will stay straight. Yes, I do add a tail. It marks the exact center back and I just like it to have a tail.

Collar: Crochet a strip of 12 dc. Place around poodle's neck, sew ends together. 

NOTES:
Gold braid, ribbon or felt also make a nice collar.
Add small bell or yarn bow at neck.
Ribbon or yarn Bows in hair and/or small flowers are also cute.
Rhinestones or broken bits from old jewelry can be used for glitz.
Just remember the trim should be as washable as your poodle.


Wednesday, October 30, 2013

Kitten Pocket Purse

Page Under Construction

Pattern is complete

Photos Coming Soon


Size: about 6 inches in diameter

This little pocket purse was designed only to hold small toys or treasures. 

If it is to be used to carry monies, small change etc, 

I suggest a simple lining be inserted.


Materials
Written in U.S. crochet terms
Size I 9 - 5.50 Susan Bates Crochet Hook
Small hook (if making heart nose) size F
large yarn needle
Red Heart Super Saver - Color of choice (Less than 4 ounces)
Small amounts of black for eyes and whiskers
color of choice for nose, handle and bow
White button if desired
 

NOTE: Leave long tails on all pieces for sewing.

Video tutorial for how to make a “magic circle” can be found here”

Body of purse: can be worked in joined rounds or as a spiral.  If you make it as a spiral, you can avoid the telltale joining line but it will not be perfectly round.  However when finished I have found the slight difference is not obvious.
To work in rounds: 
Back:
Work face up do not turn.
Start with magic circle, ch 3, 11 dc in circle, (join all rounds with sl st,)
Rnd 1: Ch 2, dc in joining (*2 dc in each st) around. (24 dc)
Rnd 2:  Ch 2 dc in joining (*1 dc in next st, 2 dc in next st,*) around (36 dc)
Rnd 3: Ch 2 dc in joining (*1 dc each next 2 sts, 2 dc in next st,) around (48 dc
Rnd 4: Ch 2 dc in joining (*1 dc in each of next 3 sts, 2 dc in next st) around, (56 sts)  
                                              leave last 15 stitches unworked.
Front
Rnds 1 - 3 Work same as Back.
Rnd: 4  Work same as back to last 15 sts., ch 2, sl st in same st, sl st in next 8 stitches, ch 10, sl st in same st, sl st in next 7 sts, join work in end.  (Button loop complete)

To work body of purse as spiral:
Back:
Start with a magic circle,
(Sl st, 1 sc, 1 hd , 10 dc in circle,) place marker and move it up at end of each row, do not turn.
Rnd 1: work (*2 dc in each st ) around. (24 dc)
Rnd 2: work *(2 dc in next st, 1 dc in next st) around (36 dc)
Rnd 3: work *(2 dc in next st, 1 dc in each of next 2 sts,) around (48 sts)
Rnd 4: work *(1 dc each of next 3 sts, 2 dc in next st,) around, leave last 15 stitches unworked. (56 sts) End off. 
It may look a bit off shape but it will all work out
Front:
Rnds 1 – 3: Work same as front up to last round
Rnd 4: Work same as front for 42 stitches, ch 2 sl st
in the 42nd st, sl st in next 8 stitches, ch 10, sl st in same st, sl st in next 7 sts, join, work in yarn end. (Button loop complete)

Noses (your choice style and color)

Round Nose 
Start with a magic circle, 6 sc in circle. Join, end off.

Heart Nose  Use F hook, Cut a 1 and 1/2 yard length of yarn.  Separate 4 ply yarn to 2 ply.  Start with magic circle, Sl st in ring chain 3, 3 dc, 3 hd, 4 sc, 3 hd, 3 dc, ch 3, sl st, all in ring. Pull yarn tail and draw ring tightly closed. Tie, Pull into heart shape   


Eyes (make 2)  With Black: Start with magic circle, 6 hdc in ring. Join, end offIMG_4423

Ears (make 2)
Start with a magic circle, 6 dc in circle, join, ch 2, turn
1 dc in f irst st, 2 dc in next st, 3 triple crochet in next st, 2 dc in next st, 2 dc in last st,
End off
IMG_4422

Simple Bow
Using color of choice, chain 11. Sc in 2nd chain f rom hook and each chain across. (10 sc)
ch 1, turn. Sc in each stitch across, ch 1, turn. Repeat till 4 rows are complete. End off.
Using a length of yarn in the same color, tightly wrap center of strip to form bow shape.
IMG_4427

Crochet Bobble Button
Start with magic circle. Holding back last loops on hook, 10 dc in ring. Yarn over draw through all 10 loops on hook, ch 1. End of f . Draw up magic circle and tie ends together to f orm bobble type button. Sew to back section of purse.
IMG_4429


WARNING:
For safety with young children, handle should be too short to fit over child's head
 
Handle Ideas:   You can make a single or double handle.

Use a Knitting Spool, or crochet a standard " I " cord to create a 25 inch length to use as a shoulder strap.  You might prefer to use a twisted cord or a braided cord if preferred or single crochet a length of flat braid about 4 or 5 stitches wide.

You could also chain the desired length, then working on back side of the chain, slip stitch in each little hump on the back of the chain, end off.
IMG_4407
  
Assembly
Sew features in place before putting the front and back together.
Please refer to diagram for placement:
Matching check points, (Red ) fold front of purse left to right to determine exact middle of purse.  Working on the right side, counting the center as beginning row 1, stitch nose in 3rd row at center of front
Stitch eyes in 2nd row at center of purse, about 1 inch apart
Stitch kitty whiskers as desired.
Stitch ears in place (purple line on diagram)
Stitch bow in place as desired

Joined Rounds

Spiral
FACE 3
Assembly:
Once features and embellishments are attached join front and back of purse.
Place back and front pieces together, right side face out.
Starting at first RED check on left and working through both pieces, crochet in each stitch around outside of bag, leaving center 15 stitches at top unworked.
Attach strap by inserting, front to back through space between the first and second stitch at points. (RED DOT) Fold up about 1 ½ inches, make several stitches through folded part then tightly wrap tail around strap, insert needle under wrapped band and pull tail under the band and up into the strap. Repeat for second side of strap.
Attach button or bobble to center top on back of purse. Work in any remaining ends.

Thursday, July 11, 2013

So Simple Box Stitch Shawl

This is a simple shawl pattern, similar to the popular Granny Square Triangle Shawl.  Made with the Box Stitch Pattern it does not display all of the holes of a true Granny Square Stitch.  It is worked with worsted weight yarn and it is what I would consider a very generous size shawl for those of us who dislike bare arms and want lots of coverage. 

IMG_4518 Materials:

16 oz any soft worsted Weight yarn  color of your choice

Susan Bates U.S. Size I – 9 crochet hook

Size approximately 80" wide by 40" deep including border


Row 1:  chain 6, sl st in first st to form ring.  Or start with Adjustable Loop
Row 2:  chain 3, 3 dc, ch 2, 4 dc in ring, ch 1, turn ( 8 dc)
Row 3:  sc in space between first 2 dc, chain 3, sc in ch 2 space, ch 3, sc in same space, (point made) ch 3, sc between last 2 dc, turn.
Box Stitch Shawl
Row 4:  ch 3, 3 dc in first single crochet, (this adds a new cluster to the beginning of each dc row) 3 dc in ch 3 space across row to the 3 chain loop (point) work 3 dc, ch 2, 3 dc in loop, 3 dc in next 3 ch sp, across row ending with 4 dc in last single crochet, turn. Your shawl will gradually form a natural curve at the ends as double crochet rows are added.
Row 5:   ch 1, sc between first 2 dc, chain 3, skipping 3 dc, work a sc between the dc stitches forming groups of 3 dc clusters, to the point.  In the point work sc, ch 3, sc all in the same space, ch 3, continuing to form 3 dc clusters to end of row, ending with ch 3, sc between last 2 dc, turn.
Box Stitch Shawl 2

Repeat: rows 4 and 5 until you have 28 double crochet rows. 
For additional Photo tutorial on how to get started:
http://idealdelusions.blogspot.com/p/for-this-tutorial-i-changed-colors-only.html

Depending on your choice of border you may wish to work row 5 one more time to take advantage of the 3 ch loops as a base for the border.

I love a basic fringe for a border; of course, as always, you may add the border of your choice or none at all. 

On this shawl I wanted to make it a bit more fancy so I adapted the border from Doris Chan’s “All Shawl” which can be found in her free pattern on Ravelry. 
http://www.ravelry.com/patterns/library/all-shawl 

If you wish to add the same border I did, you need the All Shawl pattern by Doris Chan.
If you observe the pattern you will notice it alternates shell patterns with pineapples. 
I ended my shawl on a single crochet row so I would have the chain 3 loops to work in, instead of the double crochet stitches. 
I wanted a pineapple stitch to be at the center of the point, so starting at the point, instead of counting  as 1, 2, 3, I counted the point loop as a pineapple, space, shell, space, pineapple, space, shell, space pineapple, etc.. until I got to the beginning of the row.
It so happened on my shawl the first loop would be a shell.  I then began on the second row of the border  (see the  mark for row 2 on the left side of the graph on the top of page 9 on the All Shall Pattern)
I followed that graph and I chained 3, ((but I worked a double crochet in the same stitch (see red arrow) on my photo below because I wanted a solid edge)) then I worked chain 1, double crochet shell, ch 1, skipped a loop, triple crochet set, (to start pineapple) skipped a loop, worked a dc shell, skipped a loop...repeat to the point.
In the point I worked the triple crochet set for the pineapple, then starting up the other side I skipped the next ch 3 loop and worked a shell, skip a loop, start triple crochets for the  pineapple.   When I got to the end of the row I chained 1 and worked 2 double crochet in the last stitch.  There you have the base for the border.  NOTE: If the the base for the border seems a bit tight for your shawl, try putting 2 chain stitches between each shell and pineapple stitch instead of just 1 as you work across each row.

Follow the graph rows 3 – 6 working shell in shell stitches and pineapple stitches required for each pineapple to complete your border.
Page 8 gives a close up detail of how the finished pattern should look.


I received an email that said, in part: “I finally got it worked out but not starting with a shell but a space. I am glad I counted the pattern back to the start and not assumed mine was the same as yours. I took advantage and made my edging border begin with ch 3,dc,dc, in the first 3 stitches. Then did a shell in the next loop. It worked out great and the pineapple hit the point loop. I finished the row with 3 dc in the last 3 stitches. That really gave me a nice straight edge for the border all the way through. I found the graph a bit confusing as well.  How you applied it to your pattern made perfect sense to me.  


IMG_4490
This shawl is displayed spread out on a standard double size bed.
~~~~~~~~~~

This is the same shawl worked in Red Heart Super Saver.  14 oz brown, 7 oz black, with a bit of both left over.  I used U.S. size I-9 Susan Bates Hook (my favorite size)

This is what I consider a heavy duty working shawl.   The shy fellow here is my dear heart and he is the one who puts up with all my antics and supports me in all my endeavors even when that means holding up my latest project for the camera.


Shawl is displayed on a Queen sized bed.
I love a deep swishy fringe so I cut 18 inch lengths and used 2 strands in each stitch, alternating the brown and black.

This little gadget is what I call a shawl button loop. 
I make them to match all my shawls of this type.
I use 2 strands of the same yarn and make an “I  cord” about 8 inches long. 
Then I make a bulky knot in each end.  I used a Knitting Knobby to make the cord.
A Knitting Knobby is a new gadget used for plain old fashioned spool knitting.
The ends can be pushed through the larger spaces in the front of the shawl to hold it closed.  If your stitch is tight enough you can just poke the ends through on each side like a button.  If your stitch is loose you can tie it or run it through twice.  Or if you prefer you can make it much longer and use it to "lace up" the front of your shawl (like a shoelace) giving a poncho effect. 


 ~~~~~~~~~~~~
This is the same shawl and the third and last view for this post.  I selected what I thought was a 16 ounce “mill end” bag of powder blue sports weight yarn, that I purchased at A. C. Moore for this version of the shawl.  I used a simple “V” stitch border with a picot in the last round to soften the edge and it was worked with a size “J” Susan Bates hook.  I like to use a large hook with a light yarn for a softer, flexible feel to the finished item.  I do have to crochet slower as it is more difficult to maintain an even tension with an oversized hook..
I am delighted how it came out and also surprised.  I expected it to be smaller than the others because of a lighter weight yarn but it is in fact larger.  Why ?  I didn’t know so I weighed the shawl.  It would appear I acquired a very generous mill end bag that was actually 18 ounces and not the expected 16.  The shawl is about 47 inches from the shoulder to the point and it is about 94 inches wide.  I do not have a place where I can spread it out flat and take a photo of it but I did get a few photos and close-ups.


This shawl can also be made in any size from a 
shoulderette to as large as you like. 
I, myself, love an oversized shawl as I like generous arm coverage. 

One thing I would like to say in favor of a deep shawl, such as this one, 
the wearer can lift it to cover her head and still have 
full coverage of her arms and shoulders.


When the shawl is as large as you want it you can add the border of your choice.
To make the border on this shawl, I stopped the basic shawl pattern on a single crochet and chain stitch row, reference (row 5), turn..

Border Pattern Stitch   double crochet, chain 2, dc in same space.  “V” stitch made

Row 1  Ch 3, dc in first stitch (for a solid edge) dc, ch 2, dc in the next 3 chain loop (counts as first “V” st,) work 1 “V” st in each 3 chain space to point. Work (“V” st, chain 3,  “V” st)  in the 3 chain loop at the point, continue, working 1 “V” stitch in each 3 chain loop to end, work 2 dc in last stitch.  Turn

Row 2:   Ch 3, dc in first dc,  “V” stitch in center of each “V” stitch, to point. Work “V” st, chain 3,  “V” st  in the center space of the point,  “V” st in each “V” st to end.  2 dc in last stitch.

Repeat Row 2 to make your border the width you like  (This shawl has a border 5 rows deep)

Picot stitch:  Double crochet in center of “V” st, chain 3, slip st in first chain of chain 3, dc in same “V” stitch = "V" st with picot on top..

Final round  Work "V" st with picot, in the center of each “V” st of the previous row, working  (dc, picot, dc, picot, dc, picot, dc)  in the center chain space of the point, work “V” st with picot in the center of each “V” st to end, 2 dc in last stitch.
 To help you plan ahead, this shawl had 35 double crochet rows, 35 sc / chain stitch rows and 5 rows “V” stitches for the border.  When I finished this shawl I had only about 7 inches of yarn left, it was that close. 


Yes, I know I said the blue shawl would be the last one I posted for this pattern but today I want to talk about “Caron Simply Soft Party Yarn”.   Since I did add a little something extra to the design I thought I would just sneak it in on this same post. The color of this shawl is Silver Sparkle but there is a nice selection of other colors and I loved working with this soft, shiny yarn.  I think it made an elegant shawl.  Modest but has a discreet sparkle that can be worn day or evening.   This shawl is a bit smaller and is more for dress up than a heavy duty working shawl.

I used 4 Skeins (3 oz. 85 G) Caron Simply Soft, Silver Sparkle and a Size I Susan Bates Hook

It is hard to capture the sparkle with a camera unless you get the light just so.  I did the best I could do but it does not do justice the luxurious feel of this yarn.  You really need to see and touch it.


I worked the pattern until I had completed the first 5 rows of double crochet groups.  On the next row instead of single crochet, I worked a double crochet and chain stitch row.  
So the row would be worked as ch 3, dc between first 2 dc, chain 3, skipping 3 dc, work a dc between the dc stitches forming groups of 3 dc clusters, to the point.  In the point work dc, ch 3, dc all in the same space, ch 3, continuing to form 3 dc clusters to end of row, ending with ch 3, dc between last 2 dc, turn.
The following row, I resumed the pattern of double crochet groups stitches and worked as per the pattern. 

On this shawl I put my space row after each set of 5 double crochet rows.  To do this  I inserted the row of double crochet and chain 3 stitches instead of single crochet and chain 3, then resume the pattern.  The height of the double crochet stitches are what make the spaces.  You can put the spaces rows anywhere you want them.  


The border on the Gray Sparkle Shawl is also an adaption of the border created by Doris Chan for her All Shawl Pattern.  It is the same as the border on the first shawl shown on this post. 
The information and link and my adaption notes are listed above with the pattern instructions.


Pattern/Photos copyrighted ©

~~~~~~~~~~~~~~~~~~

For those of you that have considered choosing a variegated yarn for this project, this beautiful interpretation of the So Simple Box Stitch Shawl was stitched by B. L. Pomroy-Martinez who has generously allow me to showcase her work on my site.  She created this amazing shawl in:
Red Heart Super Saver print yarn “Monet”  E300.0310 
Please double click this photo to enlarge